How to Make a Prairie Star Quilt Block using AccuQuilt
Let’s use AccuQuilt to make a Prairie Star Quilt Block! In this Prairie Star AccuQuilt tutorial I am going to walk you through how to cut out pieces and sew them together to make a 14″ Prairie Star Quilt Block!
Quilt Block Video Tutorial
Do you prefer learning how to make a Prairie Star quilt block by watching a video? I have put together a quilting video tutorial to walk through how to cut out pieces for a Prairie Star block using AccuQuilt and how to piece the quilt block. Check it out below:
Different Versions of Prairie Star Quilt Blocks
I absolutely LOVE how versatile the Prairie Star quilt block can be! I’ll share with you a couple different versions that I made, and you can download a PDF with instructions to make both versions here. The quilt block pattern is free when you subscribe to my email community.
The two versions of the Prairie Star that I am showcasing today are the scrappy Prairie Star and a 6-color Prairie Star.

Making a Scrappy Prairie Star using AccuQuilt
Making the scrappy star is definitely the easiest in terms of planning and layout design. You literally just pick some scraps and start cutting! I made this one first as a way to test out the die and get my bearings the first time I ever made this block.
I love aiming for scrappy on my first time trying a new block because there is less mental planning involved and you can really just get started and learn as you go!

Making a 6-Color Prairie Star Block
While this Prairie Star option does take a little bit more planning and intentionality in the beginning stages, I totally think it’s worth the effort! Make sure you download my pattern in the link above to get a coloring page and planning help for making your Prairie Star using this layout option.

Tools & Supplies for making a Prairie Star Block
In order to follow this Prairie Star quilt block pattern, you will need a few key things:
- AccuQuilt fabric cutting machine
- AccuQuilt Prairie Star BOB die
- 10″ x 24″ cutting mat
- Assorted fabrics (cotton is preferred) cut into 2″ strips
- Misc. Sewing Supplies
Skills & Techniques for this AccuQuilt Tutorial
The Prairie Star block is not something I would recommend for a beginner, as can be a little tricky. But, I am here to help make it as easy as possible for you. There are a few key skills I’d recommend you build before diving into this Prairie Star project.
Piecing Small Pieces
One of the trickier parts of making a Prairie Star Block like this one is that the pieces are pretty small! If you normally work with larger pieces, making the switch to smaller ones will take a bit more effort and precision. Which leads me to the next super important skill…
Stitching accurate and consistent 1/4″ seams
Due to the nature of the angles in a Prairie Star block, as well as the size of the small pieces, a consistent and accurate seam is particularly important! If you want to learn more about how to set yourself up for success with accurate stitching in your patchwork, check out this article: How to sew perfect 1/4″ seams
Sewing Y-seams
Working on my first Prairie Star block was actually the first time I ever personally have sewn a Y-seam, and it turns out, they are actually less scary than I thought! If you have a solid 1/4″ seam down, and you are good at stopping sewing when you intend to, then it’ll be a breeze for you. Just take it slow and have your seam ripper handy

How to use AccuQuilt to Cut Fabrics for a Prairie Star Block
The Prairie Star Quilt Block BOB die is designed to cut one 5-color block in just one pass through the cutting machine. If you’re making alternate layout options such as the scrappy version or the 6-color version, you may have a slightly different experience.

Prep your Fabrics
Before you even start cutting out your fabrics for the Prairie Star block, you’ll want to begin by preparing your fabrics. I personally grabbed a selection of scraps and cut them down into 2″ strips.
Cutting with AccuQuilt
Begin by laying out your main star colored fabric strips across the Piece A sections of the AccuQuilt die. If you are making the scrappy version, it doesn’t matter very much how many Piece A diamonds you get from each fabric, but if you are making the 6-color version, make sure to pay attention to how many you cut of each color.
See the free pattern linked above for the full instructions and even coloring sheets to help you plan your cutting!
How to Sew a Prairie Star Block using AccuQuilt
For a complete sewing demonstration showing how to piece the Prairie Star quilt block, I highly recommend watching the video embedded above! Or, if you prefer seeing written out instructions, the free PDF pattern is definitely something you should download and save for later!

Step 1: Decide on your Layout
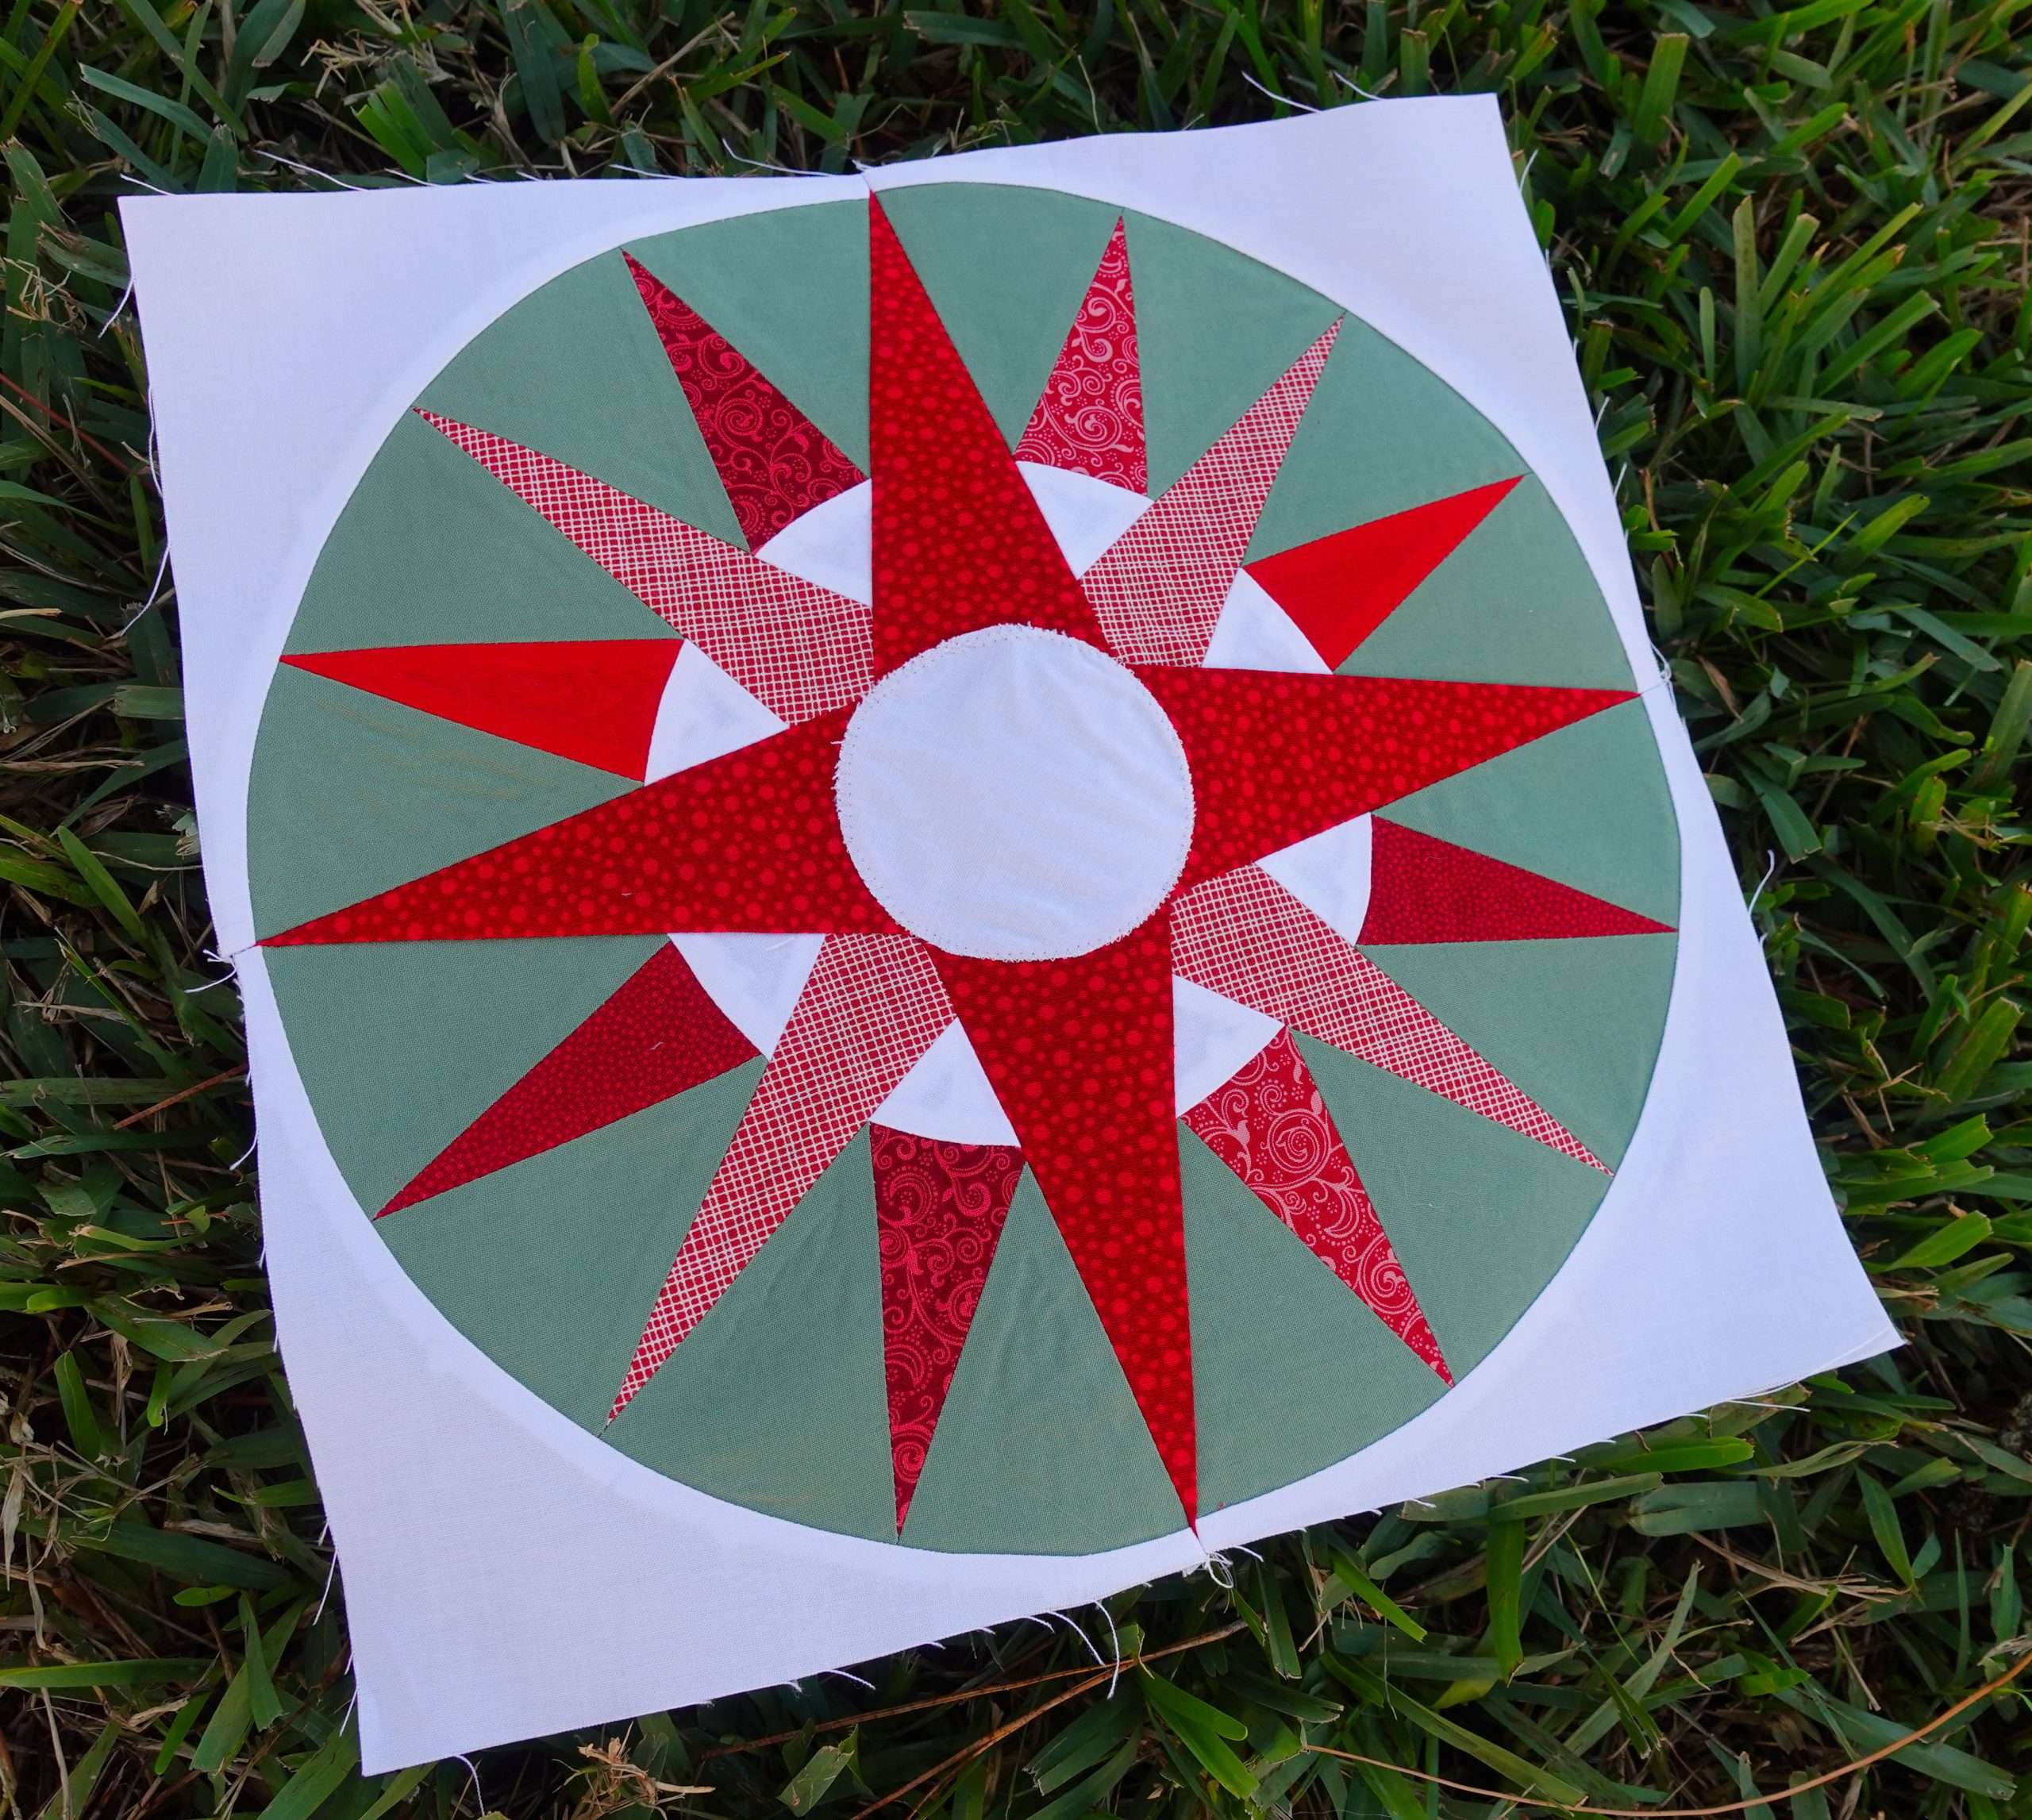
A Prairie Star quilt block consists of 8 diamond shapes, which are each made of 9 small diamond patchwork pieces. For a symmetrical star, you’ll make your 8 units identical, unless you are using the scrappy method as mentioned above.
Before you even start sewing, I recommend planning out where each piece will go. You can find have some helpful coloring sheets in this free pattern which you can use to plan out your blocks. Once you’ve decided on layout, the stitching is the easy part!

Step 2: Stitch the 8 large Diamond Shapes
Begin by stitching 2 diamonds with right sides together, and then add a 3rd to make a row of 3 small diamond pieces.
Next, stitch 3 rows together to make 1 large diamond shape.
Once your 8 diamonds are ready, go ahead and sew them together!


Step 3: Add Your Background pieces
I will admit, adding the background pieces was the trickiest part for me! It was my first time doing Y-Seams, which is actually pretty wild to think about. How have I been quilting for a decade and hadn’t even tried a Y-seam?! Well, this was the perfect opportunity.
Watch the video linked above to see how I sew the Y-seams in this block. I begin by adding the Piece C triangle background pieces, and then sew in the Piece B corner square background pieces to finish it off!
(If you’re following the steps that AccuQuilt provides, you’ll see that they recommend adding the B pieces into the corners as you sew your diamonds together.)

More AccuQuilt tutorials
Do you want to check out more tutorials for using your AccuQuilt Go! fabric cutting machine? Take a look at some of these popular posts: